Humpy
Hook: Tiemco TMC101 or a similar hook, sizes 16 to 8.
Thread: Yellow 6/0 (140 denier). Use size 8/0 (70 denier) thread for tying really small Humpies.
Tail: Elk hair is preferred, but you may substitute deer hair.
Body: Tying thread.
Back: Elk hair (preferred) or deer hair. Use 2-millimeter- thick tan or gray closed-cell foam for the Cheater’s Humpy.
Wing: The hair used to form the back on the traditional version of the Humpy, or 2-millimeter-thick yellow closed-cell foam for the Cheater’s Humpy.
Hackle: Mixed brown and grizzly, dun, or dun mixed with your choice of color

Wrap a good thread base so your fly won’t slip around the hook. Tie on a slightly bushy tail, but don’t get carried away. Notice how the thread wraps actually form a tummy that extends two-thirds of the way forward. Bind the hair butts tightly, but allow the wraps at the tail’s base to be just a bit looser; this keeps the tail from flaring too much.

Here we see two flies in progress. I’ve tied a second bunch of deer hair on the top fly equal in amount to the tail. It must be exactly the right length to both fold over the fly’s tummy and make the wing. Oh, does this get touchy! You’ll overestimate, and then overcorrect and then undercorrect. I have two solutions. First, if you’re stubborn, burn what you see here into memory. The hair for the back and wing ought to extend only a very little farther beyond the tail. Got it? Now, don’t attach the hair as I’ve done; I did it here to show you the correct proportions. If you did it this way, you would suffer frustration trying to separate the back hair from the tail to pull it forward. A glance at the next photo reveals that I actually tape down the tail to segregate it from the back hair before adding the latter. We’ll call the fly on the bottom a Cheater’s Humpy. On this pattern, we’re replacing the back hair with a strip of tan or gray foam equal in width to two-thirds of the hook gap. Notice that the thread wraps holding the foam in place extend only halfway up the shank. This is important!

Okay, so let’s stubbornly finish our classic Humpy. First, quickly tape down the tail before adding the hair for the back and wings. Moisten your fingertips to aid in your grip when pulling the back hair forward. Keep it tight and on top of the hook while securing it with several thread wraps. Don’t clip those tips!

Here we have our two Humpies in progress. Below, the back foam on the Cheater’s Humpy has been pulled forward, tied off, and trimmed. We’re fighting that noble fight on the top fly. I’ve pulled the hair tips up to form the wing, and wrapped a thread dam in front to brace it up. I’ve also wrapped around the base of the wing and tried to force it back with diagonal wraps. I’m even going to cement the base, although I hold little hope my wing will stand up straight forever.
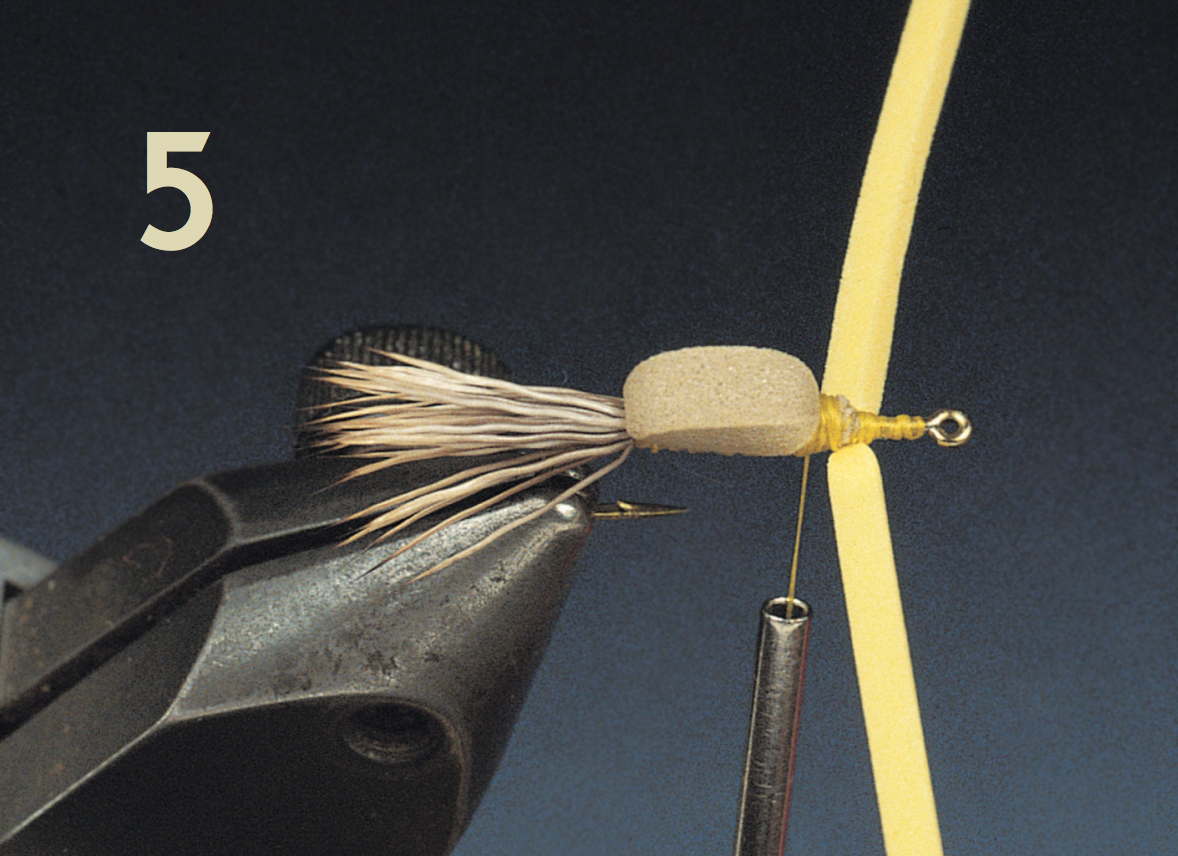
Compared to tying a classic Humpy, adding a wing to our Cheater is a cinch. The strip of foam used for the wing is narrow. I’ve tied the strip under the hook perpendicular to the shank. I’ll finish by pulling both sides up and wrapping thread around their bases to keep them upright.

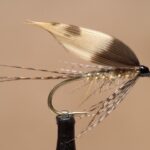
Both Humpies, finished with classic brown and grizzly hackles, look quite enticing. The yellow wing on the Cheater’s version makes it easy to see on the water.
I’ve fished many variations of the Humpy. Perhaps you’ve seen Royal Humpies; they’re tied with red rather than yellow thread. Solid black or brown-and-black flies are winners in smaller sizes. Oddly, a bright green-bodied variation can be effective late in the season. On the whole, Humpies answer well on far too many occasions to be left behind!
Bill “Bugs” Logan writes and ties flies with a panache all his own. He submitted this recipe a couple of days before winging off to his cabin in Norway. Ah, the life of an artist! When he’s not out knocking about a trout stream, waving a dainty rod and casting flies, you’ll find him in his studio in New Jersey. For more information about Bill’s fine art, go to his website, www.billloganart.com.