Choose wisely, and your first fly tying vise might be the only one you ever buy.
[by Porter House]
SELECTING A VISE IS YOUR FIRST IMPORTANT DECISION when beginning to tie flies. It’s not just a question of having to spend money, although this expense is a real concern for many folks. The vise you choose can help make or perhaps break your abilities as a fledgling tier. Your vise is a fly tying tool—perhaps the most important tool you will buy—and a good carpenter can’t do his best work without good tools. Fortunately, you do not have to spend a lot of money to get a very nice vise.
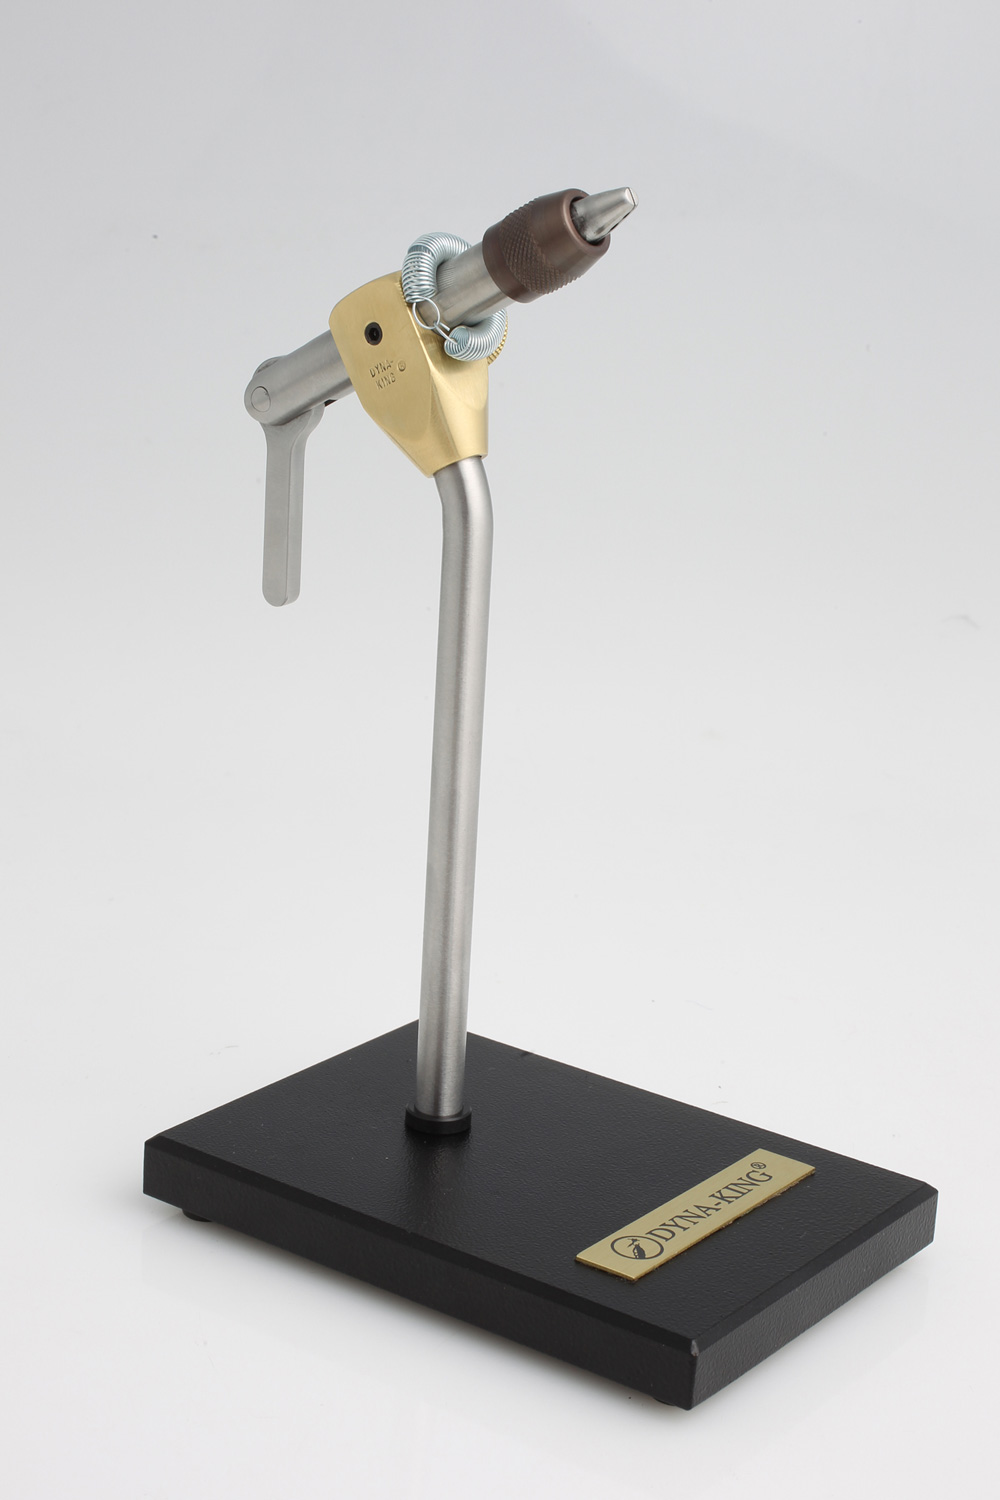
The Dyna-King Kingfisher Limited is an upright, conventional style of fly tying vise ($199). Dyna-King also offers a basic Kingfisher ($179). Raise the lever in back to open the jaws, insert the hook between the jaws, and press the lever down to close the jaws and lock the hook in place. Rotating the knurled steel barrel back and forth increases and decreases the amount of gap between the jaws to accommodate different hook sizes.
Your new vise isn’t a disposable product, not like the furs and feathers you will use to tie flies. In fact, it is possible that your first vise could very well be the only one you ever purchase. You’ll use up spools of thread and empty packages of hooks. You’ll pluck chicken feathers until the skins are bare. Your bottle of head cement will eventually thicken and then turn into a sort of thick, clear syrup. But you might tie dozens, hundreds, or perhaps even more flies using your first and only vise.

Dollar for dollar, it’s hard to beat the Wolff Apex Vise ($99). The manufacturer claims that this well-made tool handles hook sizes 32 to 6/0.
Once upon a time, the Thompson Model A was just about considered the top-of-the-line vise. I bought one with the proceeds from my 12th birthday from a fishing-and-hunting store in northwest Oklahoma City. The store was famous for its large taxidermy display; the walls were covered with the heads of exotic game and mounted fish from all over the world. This store was the unofficial headquarters for the local rich oilmen who enjoyed big time sport. It also had a small fly fishing department containing a few pegboards of fly tying materials and a case with tying tools. I felt like one of those big-wheel sportsmen the day I plunked down 20 one-dollar bills for that Thompson Model A. Sure, today I use a different (and far more expensive) vise, but many tiers use the very basic Model A style of vise for their entire fly fishing lives.

Just to prove that you can get a great vise at an affordable price, here is the Renzetti Traveler 2000 ($169.95). It comes with either a pedestal base or C-clamp and has many of the features you’ll find on top-of-the-line Renzetti vises.
Let’s talk about what makes a good fly tying vise. We’ll also discuss the features and benefits of vises offered by the leading manufacturers that cost $200 or less. In some cases, the companies that manufacture some of the most premium vises also offer tools costing about $100, but bumping our budget to $200 lets us consider several more vises and not break the bank.
Keep in mind, these are just my thoughts about what a good vise should do. There are a couple of styles of vises, each based on the manufacturers’ ideas about how to tie flies. But I have tied a fly or two, and I’ve tried all the different types of vises we will review, so I can give you some good ideas about how each tool works.

Renzetti remains one of the biggest names in fly tying vises. Although they manufacture vises costing many hundreds of dollars, Renzetti also offers the Apprentice Vise ($99).
Vise Basics
It goes without saying, but I’ll say it anyway: The vise must hold the hook securely. There are two important points to keep in mind here. First, you should not have to place an undue amount of pressure on the vise’s locking lever to close the jaws and tightly grasp the hook, and your new vise should be able to hold the entire range of hook sizes you anticipate using. It might be tough to know all the hooks you will eventually use, but unless you get into tying extra-large saltwater flies or perhaps jumbo muskie flies, all the vises featured in this article should work well for trout, warmwater, and almost all but the most specialized saltwater patterns.
The second major consideration is how the vise attaches to your working surface. That old Thompson Model A had a C-clamp that securely gripped the table edge. This is still a popular way to secure a vise in place; even some experienced tiers using very expensive vises use C-clamps. Some tiers who make bass bugs and large saltwater flies recommend vises with Cclamps so they can apply extra tension to the thread and the vise remains stationary. I have made flies as large as size 3/0 and 4/0, and frankly, I’ve never had this problem. But as I said, every tier has his own ideas about how to make flies.
The only real downside to a C-clamp vise is that the bench or tabletop must not be too thick to accommodate the clamp. This problem most likely crops up at fly tying classes—the last place you want to have problems with your vise— where banquet tables are often used; the edges of these might be too thick for the clamp. What a bummer!
I usually tie flies while sitting in my easy chair with a lapboard flopped across my legs; I usually watch a ball game or old movie while I tie. A vise with a weighted pedestal base simply fits my fly tying lifestyle. I can also travel with this vise and use it at a class, in a motel, or wherever I land.

Do you need tools in addition to a vise? This Montana Pro Vise II kit comes with all the hardware you’ll need to start tying ($132.93). You can also purchase the Montana Pro Vise II separately ($95.61).
Last summer I set up my vise and spread out a few materials on a table in camp along the Gallatin River; I popped open a brew and spent a few hours tying flies between the hatches. It was very relaxing, and a vise with a pedestal base made it easy to do.
Keep in mind that this is not an either/ or decision. Most vises accommodate both a pedestal base and a C-clamp, so you can swap back and forth, but I use a pedestal for all my tying.