by Drew Chicone
Mauro Ginervi, the creator of the Avalon fly, was born in Civitanova Marche, Italy, in 1963. He has lived in Cuba since the late 1990s. In May 2000, Mauro received the opportunity of a lifetime and started working as the Manager at the Avalon Fly Fishing Lodge in Cayo Largo, where he created one of the great modern permit flies.
Contrary to popular belief, Mauro’s Avalon pattern was designed to mimic an extra-large shrimp, not a crab. His goal was to develop a permit pattern that would work anywhere the persnickety permit swam. This goal seemed next to impossible, especially since tying materials and tools were limited in Cuba, and even there permit are difficult to entice to the fly.
Mauro began studying and deconstructing several other popular patterns and discovered that many of the flies that were meant to fish hook-up would roll or spin when stripped. This was a dead giveaway that something was amiss, and would quickly tip off the notoriously selective species. Action, position, mobility, sink rate, and behavior were all taken into consideration when designing the Avalon. In 2007, all the pieces of the puzzle were brought together when one of his customers showed him a fly with an extra attached keel system. A single piece of 20-pound mono and four stainless steel beads changed the game of permit fishing forever.
Materials
Hook: Mustad S71SNP-DT or similar saltwater hook, size 2
Thread for body: Beige Danville Fly Master Plus
Eyes: 5/32 or 3 mm dumbbell eyes
Antennae: Black Krystal Flash
Legs: Regular orange/clear Chicicone’s Crusher Legs
Mouth: Shrimp Pink Finnish raccoon
Body: Beige or cream marabou
Shellback: Pearl flat braid
Claws: Light brown ginger Zonker strips
Keel: Hard nylon 20-pound with four 2.8 mm beads
Thread for head: Fluorescent orange Danville 210 Flat Waxed Nylon
Adhesive: Solarez, Thin Hard Formula
Step 1:
Start the thread about an eighth-inch behind the eye of the hook and tie in the dumbbell eyes with a series of figure-eight wraps. Add a drop of super glue to insure that the eyes will stay in place even after you have caught a fish.


Step 2:
Advance your thread to the bend of the hook. On the underside of the shank tie in a small bunch of Arctic fox of approximately a quarter-inch. The tips should extend slightly beyond the bend of the hook. On top of the hook shank, tie in a two- to three-inch piece of 20-pound stiff monofilament. On either side of the hook tie in one to two strands of black Krystal Flash. The strands should extend past the bend of the hook two to three inches.


Step 3:
Tie in the two rubber legs, one on each side of the hook shank. Be sure they are positioned symmetrically, as this is very important for the action and mobility of the fly. Trim the legs so that they are roughly two inches long.


Step 4:
In the same fashion as the Krystal Flash and rubber legs, tie in two strands pearl flat or Diamond Braid on each side of the hook. Make sure they are cinched down tightly so they do not pull out when stretching them forward later in the process.


Step 5:
At the bend of the hook, tie in the tip of the marabou and advance your thread to the back of the dumbbell eyes. Twist the marabou until it compresses into a rope shape.


Step 6:
With ample pressure, palmer the feather forward until you reach the dumbbell eyes. Tie off the feather behind the dumbbell eyes and cut away the excess marabou. Lightly tease the body to release some of the feather barbs, giving the body a fuller look.


Step 7:
Advance your thread to the eye of the hook and tie in the two Zonker strips flesh side facing the hook shank. Wrap back securing the Zonker strips until you reach the dumbbell eyes. To flare the Zonker strips and create the delta wing shape, apply extra thread tension on the last few wraps closest to the dumbbell eyes. If the shape does not turn out as desired, wrap your thread around the strip and pull the strip into shape. The claws should be positioned at an angle of 45 degrees with the body of the fly.


Step 8:
Turn the fly over in the vise and pull the right piece of pearl braid over the body to the left side of the hook eye and secure. Pull the left braid over the body to the right side of the hook eye and secure both pieces with a series of tight wraps. The flat braid should be visible on the back of the fly when riding hook-up.


Step 9:
Slide four beads on to the monofilament keel and pull the monofilament forward until the loop forms a half-moon shape leaving about a quarter-inch gap between the beads and the shank of the hook. Secure the monofilament in front of the dumbbell eye with a series of tight wraps.


Step 10:
Whip finish and cut away the tan thread. Start the orange thread at the eye of the hook and cover all the tan wraps, creating a solid orange head. Whip finish and apply a thin coat of Solarez to complete the fly.


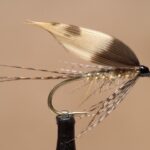
Finished Avalon

Drew Chicone is a longtime contributor to Fly Tyer Magazine. He is a fly designer, tying Instructor, and creator of Salty Fly Tying. His passion is developing and tying saltwater flies, and he helps fly tiers of any skill level learn how to develop and improve their own fly patterns. Learn more from Drew at saltflytying.com.